
Hundreds chart 1–100
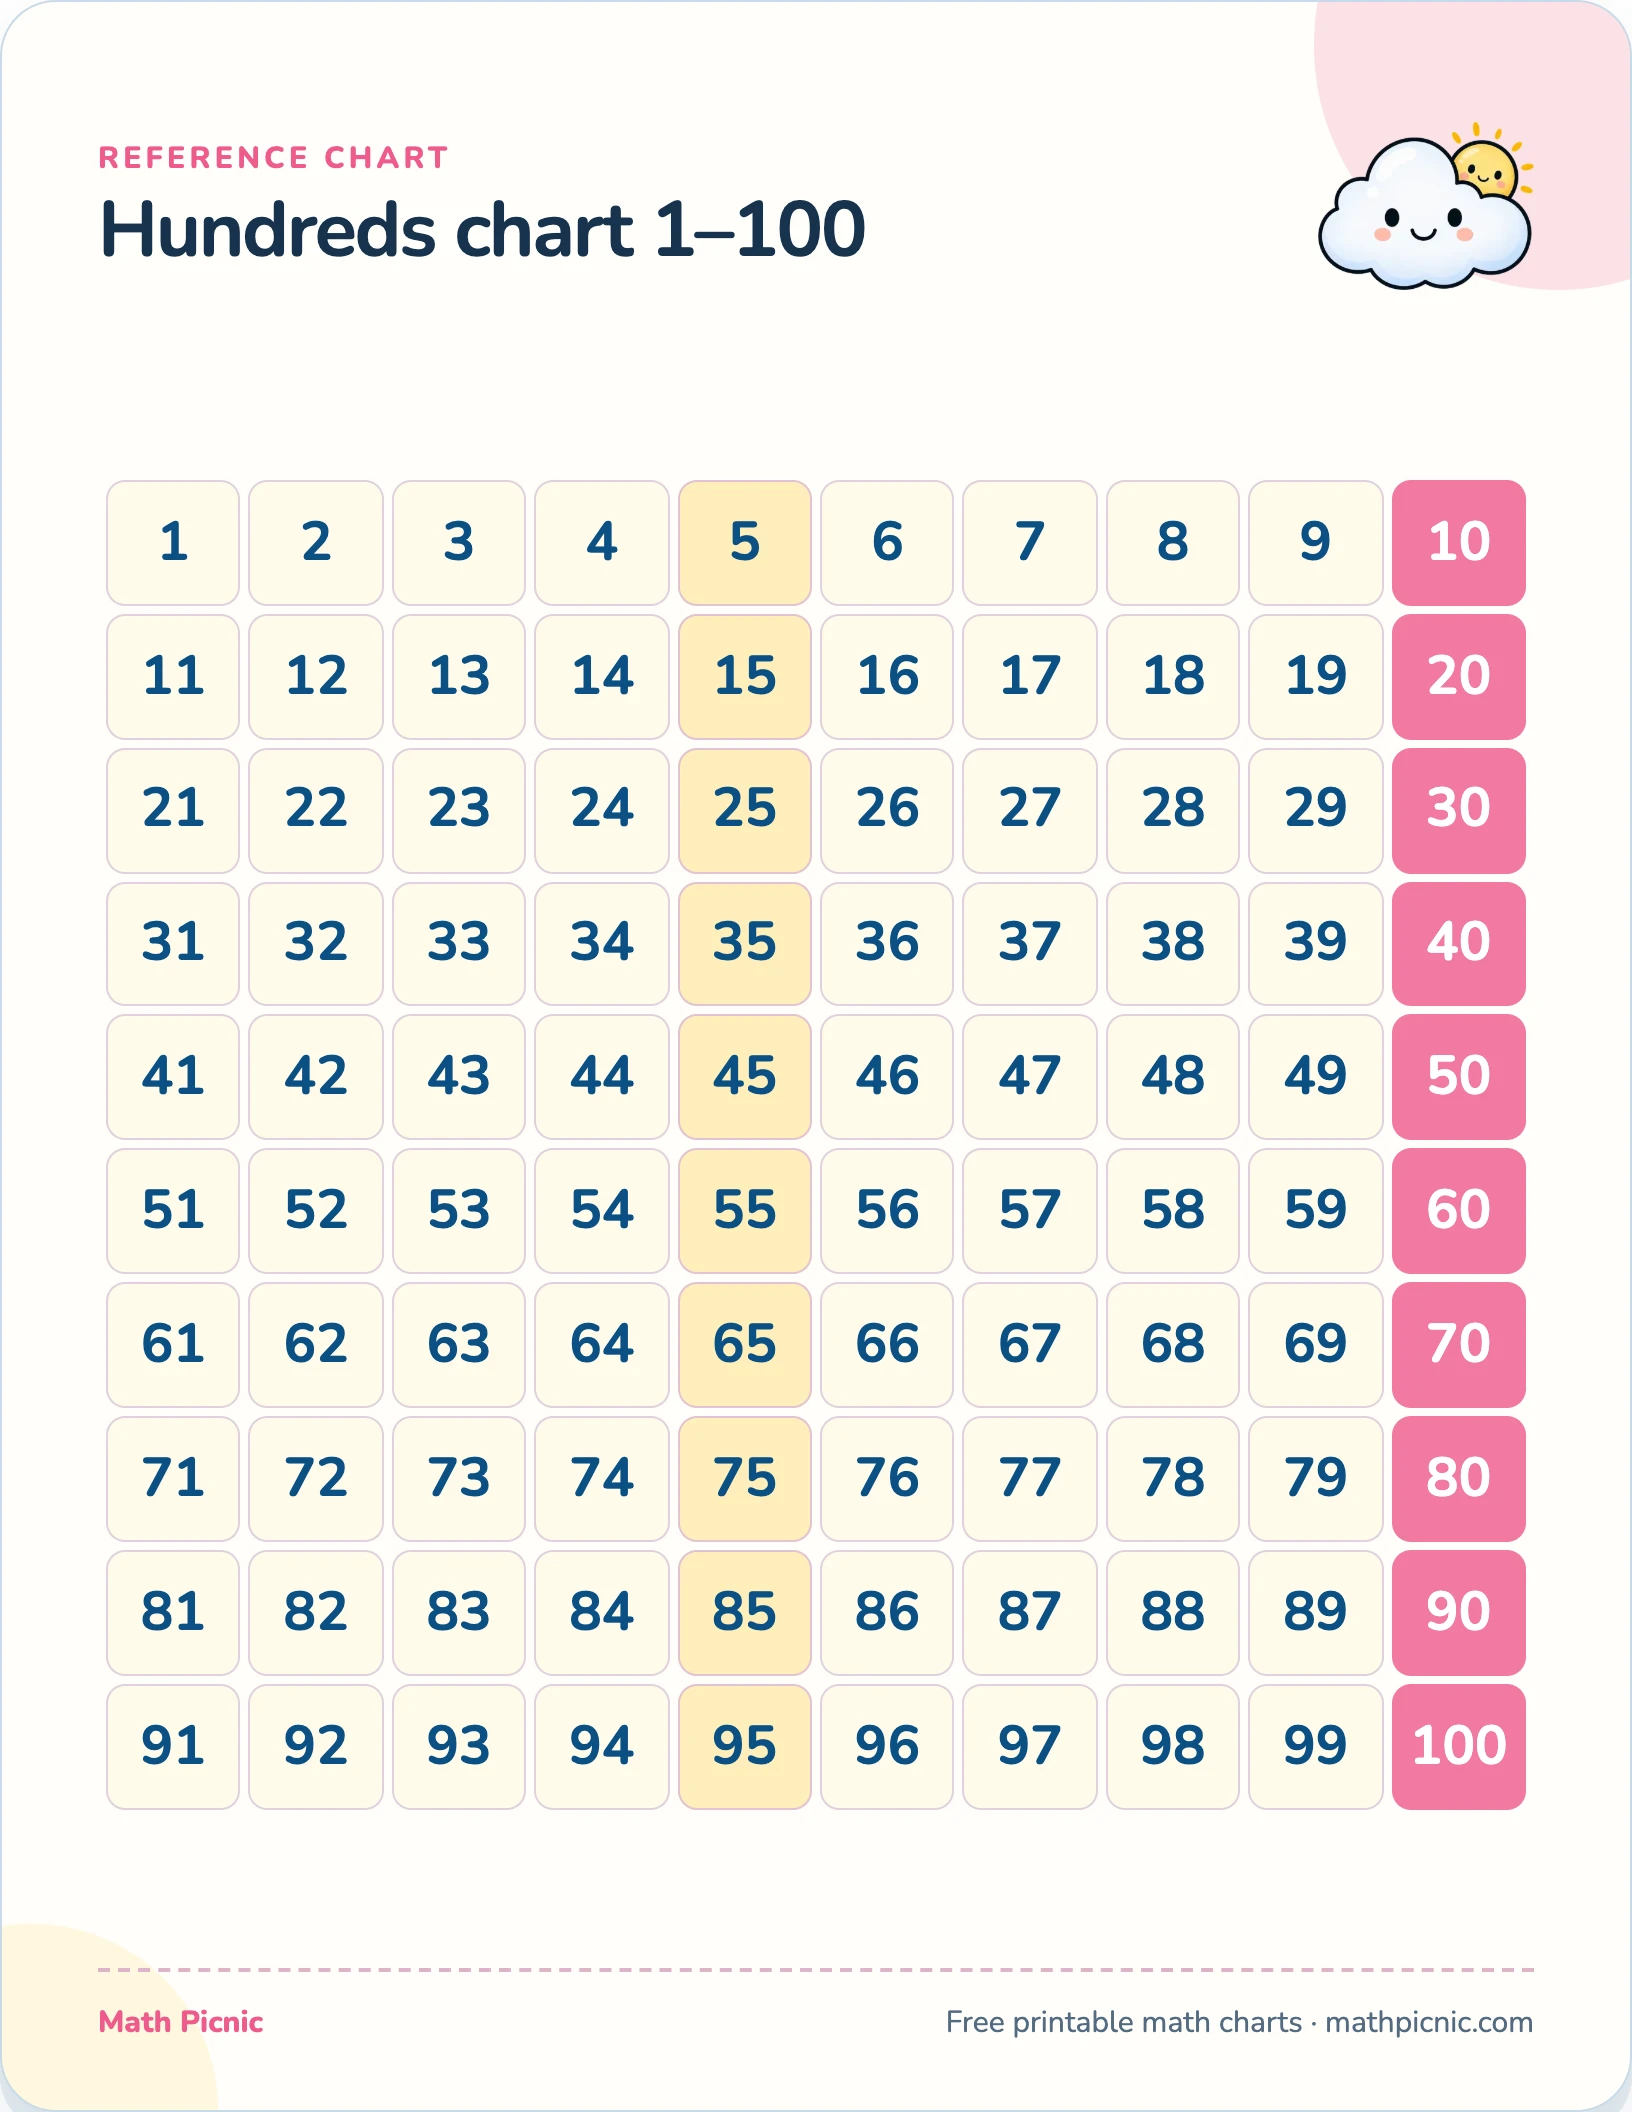
One hundred numbers in ten neat rows — call it a hundreds chart, a 1–100 number chart, or a counting chart, it is the most useful single page in early math. Counting, skip counting, adding ten, and odd and even all live on this one number grid.
Reference chart
Hundreds chart 1–100

| 1 | 2 | 3 | 4 | 5 | 6 | 7 | 8 | 9 | 10 |
| 11 | 12 | 13 | 14 | 15 | 16 | 17 | 18 | 19 | 20 |
| 21 | 22 | 23 | 24 | 25 | 26 | 27 | 28 | 29 | 30 |
| 31 | 32 | 33 | 34 | 35 | 36 | 37 | 38 | 39 | 40 |
| 41 | 42 | 43 | 44 | 45 | 46 | 47 | 48 | 49 | 50 |
| 51 | 52 | 53 | 54 | 55 | 56 | 57 | 58 | 59 | 60 |
| 61 | 62 | 63 | 64 | 65 | 66 | 67 | 68 | 69 | 70 |
| 71 | 72 | 73 | 74 | 75 | 76 | 77 | 78 | 79 | 80 |
| 81 | 82 | 83 | 84 | 85 | 86 | 87 | 88 | 89 | 90 |
| 91 | 92 | 93 | 94 | 95 | 96 | 97 | 98 | 99 | 100 |
What's on this chart
The power of a hundreds chart is its shape. Because each row holds exactly ten numbers, moving one square down adds ten and moving one square up subtracts ten. A child who discovers that has learned something that survives long past this chart: adding ten does not change the ones digit at all.
Why this chart helps
The tens column is shaded so the end of each row is easy to find, and the fives are marked lightly, which turns skip counting into something you can see rather than recite. Count by twos and the even numbers make stripes; count by fives and the pattern narrows to two columns; count by tens and it collapses into one.
More printable charts
- Addition table
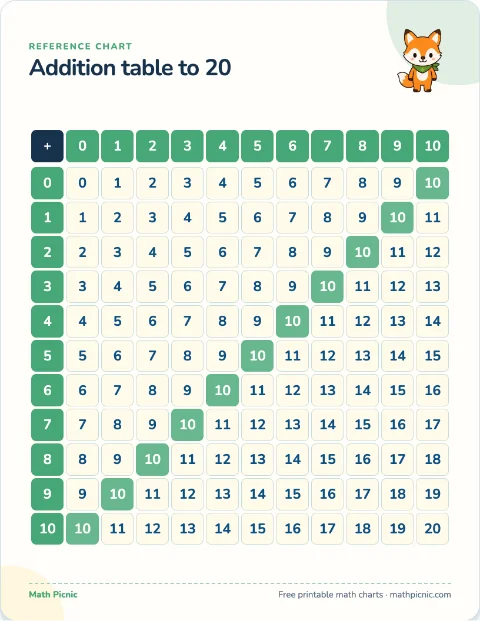 Print Follow a row and a column to the square where the two numbers meet.
 - Subtraction table
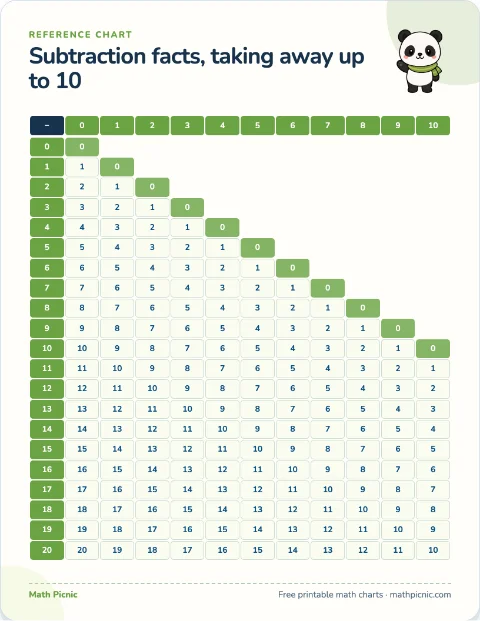 Print Start on the number being taken from, then read across to what is taken away.
 - Subtraction table to 20
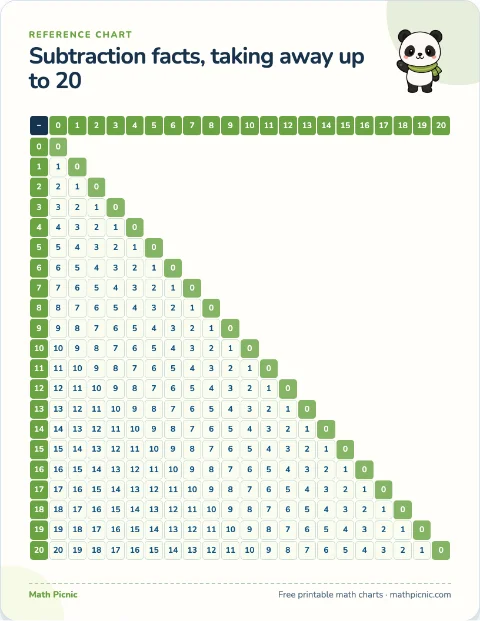 Print Find the top number down the side, the number taken away across the top.
 - Multiplication table
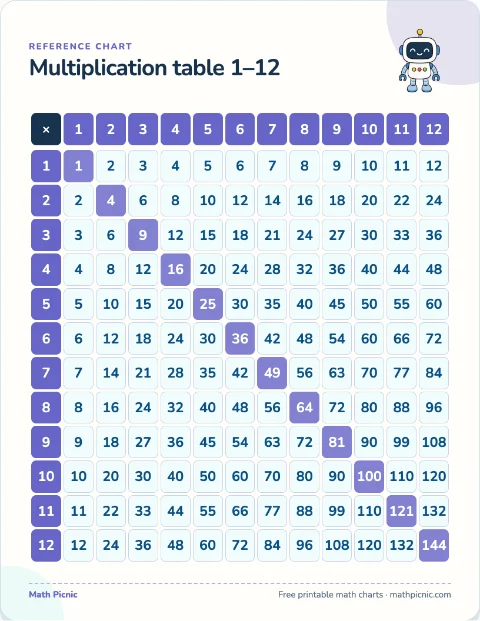 Print Read a row across and a column down to the square where they meet.
 - Division table
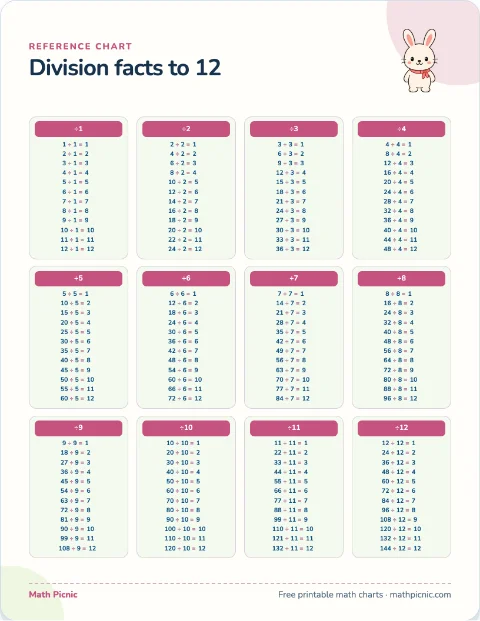 Print Find the family being divided by, then read down it to the answer.
 - Roman numerals
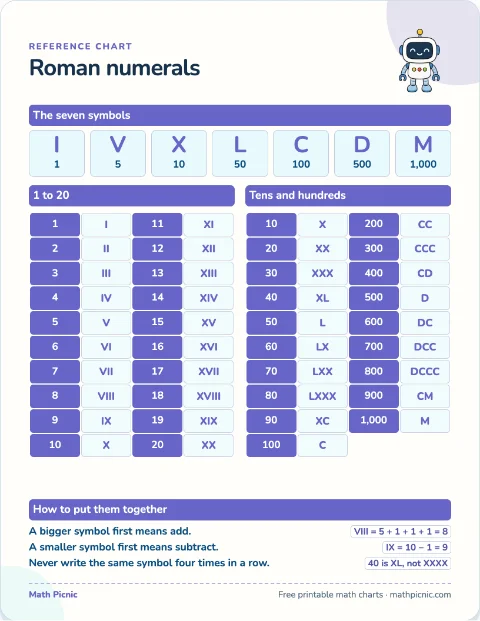 Print Build or read a numeral using the seven symbols and the three rules.
 - Multiples chart
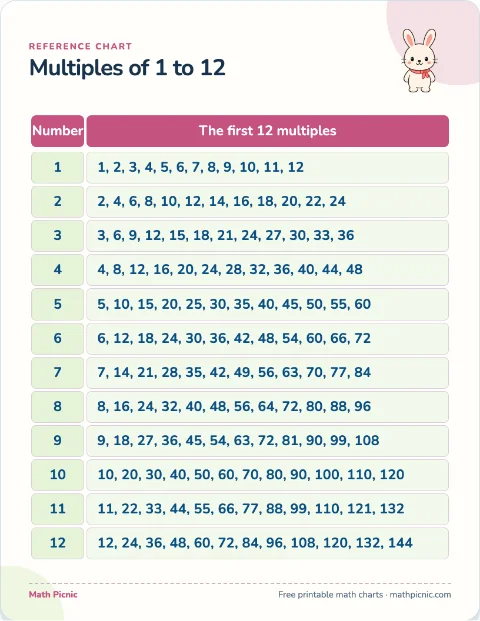 Print Run a finger along two rows until the same number appears in both.
 - Factors chart
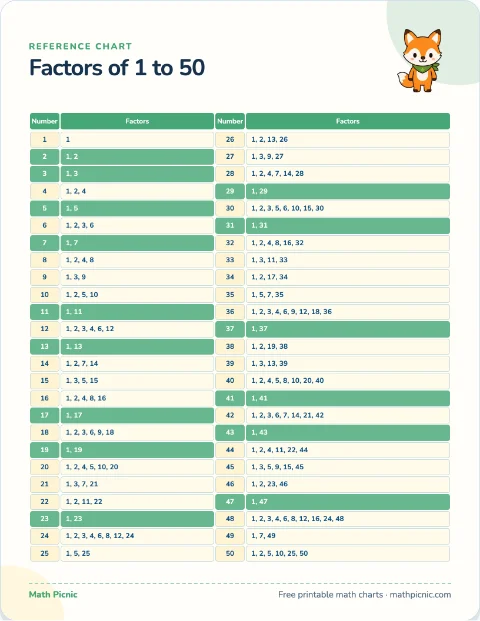 Print Read off every factor of a number before simplifying or finding a common one.